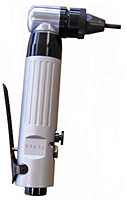
Designed for installing steel or aluminum
CAL, CAK, CAH, CAO, CFT/CAT*, CFW/CAW*, and CPB Rivet Nut Inserts (thin wall only). *Can instill these parts in stainless steel.
Right Angle allows the usage in difficult to access applications.
Features quick change nose piece for head set replacement without tools.
Spin-Spin tools are also available in a Pistol Grip Version and an Inline Version.
High temperature grease should be used to lubricate the bearing set.
Sherex recommends the use of an air regulator, air filter, and lubrication system to reduce the wear of internal components. It is also recommended to lubricate the mandrel to increase performance. Mandrels should be replaced when excessive thread wear occurs with a high quality socket head cap screw.
Spin-Spin Rivet Nut Installation
Before installing a rivet nut, it is important to ensure that the mandrel extends at least one thread beyond the end of the rivet nut. To begin the process of installing a thin wall rivet nut with one of our spin-spin tools, first turn the rivet nut onto the threaded mandrel 1-2 turns. This prevents the rivet nut from cross threading the socket head cap screw mandrel.
Next, insert the rivet nut into the proper hole in the workpiece. Once the rivet nut is inserted into the hole, press the trigger in its top F position. This will thread the tool into the rivet nut.
Note- As the rivet nut expands in the hole, the serrations will bite into the parent material. When the rivet nut starts to bend around the bottom edge of the hole, the serrations also bite into the edge creating an additional anchor point further increasing the rivet nut's resistance to spinning in the hole.
The serrations on the face of the tool will hold the rivet nut in place while the threads of the rivet nut "ride up" the threads of the mandrel. The tool continues turning until the maximum torque load is achieved, thereby stalling the tool. Once the tool has stalled, depress the lower R position on the tool reversing the tool out of the installed rivet nut.
Here is a properly installed thin wall rivet nut. You can see the serration marks left on the head of the rivet nut from the rivet nut tool. This is common for all spin-spin rivet nut installations.


